Are you looking for a great gym or fitness center in Bellingham, WA to help you reach your health and fitness goals? Look no further! We've compiled a list of the top 15 gyms in Bellingham that offer the best amenities and support to help you get fit and stay healthy. From top-of-the-line equipment to unique classes and personalized training, each of these gyms in Bellingham has something special to offer. Read on to learn more about the best gyms in Bellingham, WA to help you get fit!
15 Best Gyms In Bellingham, WA
- Bellingham Fitness
- Fitness Gear & Training
- JD Elite Fitness
- Anytime Fitness
- Training Grounds
- ProFitness Northwest and CrossFit Bellingham
- Fitness Evolution – Bellingham
- City Gym
- Apex Fitess NW
- Lab Athletics
- Kulshan Athletics Bellingham & Kulshan CrossFit
- Bellingham Athletic Club
- CrossFit X
- Evergreen Strength Gym
- Iron Mountain Strength & Conditioning
1. Bellingham Fitness

The team at Bellingham Fitness offers an array of personal training and class options to help you reach your fitness goals. Moreover, they offer a comprehensive program of aerobics, toning, and strength training classes. This is one of the top class gyms in Bellingham.
No matter what your goals are, Bellingham Fitness has something for you! With award winning trainers, state of the art equipment and an unbeatable atmosphere, you’re sure to find the perfect program to help you reach your fitness goals. Stop by today and experience the difference!
- Location: 1730 N State St, Bellingham, WA 98225, United States
- Membership: $19.99/month
- Gym Hours: 5 am–10 pm
- Phone Number: +1 360-733-1600
- Website: https://www.bellinghamfitness.com/
2. Fitness Gear & Training

Achieving your fitness goals can be a challenging journey, but with the right fitness gear and personal training services, it can be a rewarding one. At this gym, they are committed to helping the clients live healthier and feel good in their bodies.
This fitness center understands that everyone's body is unique and moves differently, which is why we provide fitness gear that is designed to fit your specific needs. The expert team will also deliver, set up, and service your equipment in the comfort of your home, making it easier for you to focus on your workouts. They are one of the renowned gyms in Bellingham.
They also offer personal training services to help you stay motivated and accountable. Their certified personal trainers provide personalized workouts designed specifically for you, based on science-backed techniques. They also offer flexible scheduling, so you can work out when it fits your schedule.
At this fitness center, they are more than just a team of certified personal trainers – they are a family. They strive to build a relationship of trust with our clients and to provide a supportive environment where you can achieve your fitness goals.
Whether you're a beginner or an experienced fitness enthusiast, they have the best fitness gear and personal training services to help you live healthier and feel good in your body.
- Location: 1605 N State St, Bellingham, WA 98225, United States
- Membership: Starting at $10/month
- Gym Hours: 5 am–10 pm
- Phone Number: +1 360-671-5059
- Website: http://www.fitnessgearandtraining.com/
3. JD Elite Fitness

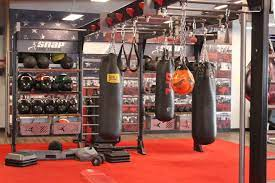
At JD Elite Fitness, the mission is to help you reach your goals with a full range of strength and conditioning equipment, expert coaching and an incredible support system. Our knowledgeable team of personal trainers and instructors are here to give you the tools and motivation needed to get you the results you want. When it comes to gyms in Bellingham, few can match their quality.
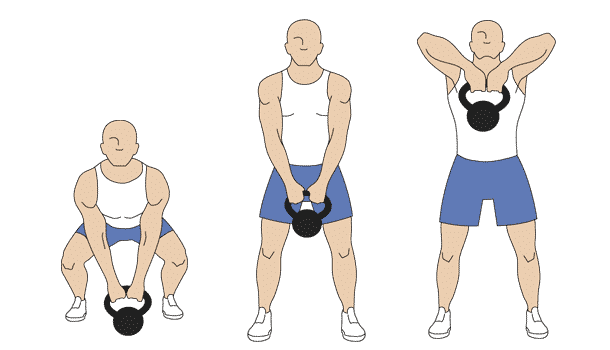
The facility has everything you need to reach your fitness goals: free weights, kettlebells, battle ropes, rowing machines, punching bags, TRX suspension trainers and more. They offer group classes and private sessions that focus on functional training, sports specific conditioning and injury prevention.
This also provides nutrition guidance, goal setting advice and body composition assessments to ensure you’re staying on track. They understand that everyone’s needs are different and we strive to customize each workout to fit your individual needs. Whether you’re looking to lose weight, gain muscle, improve your cardiovascular health or just stay active and healthy, they’ve got you covered.
At JD Elite Fitness, they believe that your health should always be a priority. The team is dedicated to helping you reach your goals and realize your full potential. Join today for a healthier tomorrow!
- Location: 1420 Meador Avenue, K-101 Bellingham, WA 98229
- Membership: Starting at $12/month
- Gym Hours: 5.15 am–6:15 am
- Phone Number: +1 360-920-6168
- Website: http://www.jdelitefitness.com/
4. Anytime Fitness

At Anytime Fitness Bellingham, you will find a safe and clean environment in which to work out. Whether you’re a beginner or an advanced fitness enthusiast, you will be able to access the latest state-of-the-art equipment and certified personal trainers to ensure that your workout is both effective and enjoyable. The knowledgeable and friendly staff are on hand to offer assistance whenever you need it. If you're looking for top-notch gyms in Bellingham, they should be your first choice.
No matter what your fitness goalsare, you can rely on Anytime Fitness Bellingham to provide the right tools and guidance you need to reach them. The team of certified personal trainers is dedicated to helping you find the right program for your individual needs. From customized one-on-one sessions to group classes, we have something for everyone. The programs are designed to be both challenging and rewarding, while also helping you stay motivated.
At this fitness center, they understand that everyone is different and everyone has their own individual goals. That's why they focus on creating custom plans and programs that are tailored to your specific needs. They also offer nutrition counseling, personalized workout regimens, and access to the vast library of resources to ensure that you're getting the most out of every workout.
- Location: 115 W Kellogg Rd Bellingham WA 98226
- Membership: Starting at $41/month
- Gym Hours: 24 hours
- Phone Number: +1 360 306 5858
- Website: https://www.anytimefitness.co
5. Training Grounds

At Training Grounds in Bellingham, WA, the team understands that fitness is a personal journey and it’s important to have the right tools and resources available. That’s why they provide a variety of services and equipment for people of all ages and fitness levels. The trainers are knowledgeable and experienced in helping you reach your fitness goals.
The state-of-the-art gym is equipped with the latest in strength-training and cardio equipment, perfect for both bodybuilding and general fitness. They also offer classes tailored to Olympic weightlifting, powerlifting, basketball, boxing/MMA, strongman, and athletic training. The locker rooms, showers, and saunas provide a comfortable and relaxing environment before or after your workout.
This fitness center believes that consultations are essential in order to provide personalized plans that will best suit your needs. They offer flexible schedules and affordable rates to make your fitness journey as convenient as possible. They're definitely among the top gyms in Bellingham.
- Location: 1524 Birchwood Ave Bellingham, WA
- Membership: Starting at $64.95/month
- Gym Hours: 9 am–8 pm
- Phone Number: +1 360-359-6565
- Website: https://bellinghamtraininggrounds.com/
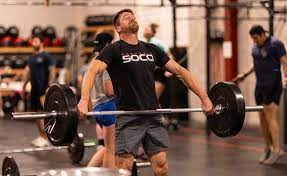
6. ProFitness Northwest and CrossFit Bellingham

ProFitness Northwest and CrossFit Bellingham offer a comprehensive fitness experience for people of all fitness levels. With programs such as Barbell Club, Self Defense and Martial Arts, Yoga, and Personal Training, you can choose the program that is best suited for you. They have established themselves as one of the premier gyms in Bellingham.
At ProFitness Northwest and CrossFit Bellingham, you will find a welcoming and supportive atmosphere with experienced and knowledgeable trainers who are excited to work with you. With flexible schedules and affordable rates, you can easily fit a workout into your day. Plus, their equipment is designed to move the way that you move, and they provide delivery and setup so you don't have to worry about transporting it.
- Location: 1305 Fraser St D3, Bellingham, WA 98229, United States
- Membership: $59/month
- Gym Hours: 6 am–7:30 pm
- Phone Number: +1 360-224-4373
- Website: https://www.profitnessnorthwest.com/
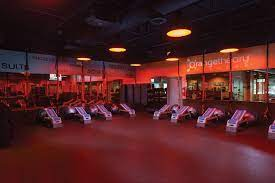
7. Fitness Evolution – Bellingham

Bellingham is a gym located in Bellingham, WA. Here you will find a full suite of amenities and ample training space. From weights, cardio and machines to group fitness classes, personal trainers and smoothie bar, Fitness Evolution has it all.
You can come in to work out with weights, cardio, machines, and jump roping. Or choose from one of their group fitness classes such as Body Renaissance, Pilates Fitness Center, Pure Barre, Orangetheory Fitness, CycleBar, 360 Fitness, Athletic Republic, 24 Hour Fitness, Touchstone Climbing, Iron Tribe Fitness, Ignite Fitness, Rise Fitness, Gladiator Fitness, Gold's Gym or CrossFit 505. They have earned their reputation as one of the best gyms in Bellingham.
Their dedicated personal trainers are ready to help you reach your fitness goals. The trainers are experienced, knowledgeable and excited to work with you. This fitness center offers personalized workouts designed specifically for you and nobody else. They also have flexible scheduling so you can workout when it fits your schedule.
- Location: 1504 Iowa St, Bellingham, WA 98229, United States
- Membership: $24.99/month
- Gym Hours: 4 am–12 am
- Phone Number: +1 360-671-4653
- Website: https://bellinghamevo.com/
8. City Gym

NuStep machines provide a low-impact, full-body workout and is suitable for all fitness levels. It's ideal for those who need to exercise in a seated position and it also offers strength training exercises.
City Gym also has free weights, weight machines and a variety of circuit machines to help you meet your fitness goals. With their monthly membership plans, you can access all their facilities at any time during the day. With their state-of-the-art facilities and expert trainers, they are one of the best gyms in Bellingham.
The gym offers personal trainers and nutrition advice so you can take control of your health and fitness journey. They also have special classes like yoga, Zumba, kickboxing, Pilates and more.
City Gym’s professional instructors will guide you through every step of your workout. They offer an encouraging atmosphere where you can get inspired and motivated to reach your fitness goals. Whether you're a beginner or an experienced athlete, City Gym is the perfect place for everyone!
- Location: 4152 Meridian St, Bellingham, WA 98226, United States
- Membership: Starting the basic membership at $199/month
- Gym Hours: 5 am–9 pm
- Phone Number: +1 360-647-1511
- Website: www.mycitygym.com
9. Apex Fitess NW

Apex Fitness NW is the perfect place for Bellingham locals who are looking to maximize their fitness goals. With a variety of classes available you can customize your fitness routine and try something new each time. Whether you are looking for a full membership or just a drop in class, they have an option to fit your needs. Come get your sweat on with us at Apex Fitness NW!
- Location: 1708 Kentucky St #4715, Bellingham, WA 98229, United States
- Membership: Starting at $176/month
- Gym Hours: 5:30 am–8:30 pm
- Phone Number: +1 360-441-2812
- Website: https://www.apexfitnessnw.com/
10. Lab Athletics

Lab Athletics is the perfect place to go for those who are looking to take their fitness and health goals to the next level. With a meticulously written strength & conditioning program, our team of certified professionals will have you sweating and pushing your limits in no time. All our workouts are backed by the science of progressive overload, so you can rest assured that you'll be able to reap the rewards of increased energy, vitality, and a leaner, stronger body. It's no surprise they're considered one of the best gyms in Bellingham, given their impressive range of equipment and knowledgeable staff
We understand that when it comes to getting in shape and achieving your goals, there's no time for detours or unnecessary delays. That's why we strive to provide you with the roadmap and guidance you need to reach your goals efficiently and effectively. With our 7-day risk free trial, you can come in and see firsthand what makes Lab Athletics the perfect gym for you. Don't wait any longer, start today and experience the difference for yourself!
- Location: 4206 Meridian St, Bellingham, WA 98226, United States
- Membership: Starting at $39.99/month
- Gym Hours: 5 am-10 pm
- Phone Number: +1 360-224-2197
- Website: https://www.labathletics.com/train-in-person1624310148654
11. Kulshan Athletics Bellingham & Kulshan CrossFit

Kulshan Athletics Bellingham & Kulshan CrossFit is committed to helping people achieve their fitness goals by offering a wide range of classes and programs. From beginner classes to advanced level training, they have something for everyone. Their group classes are designed to help you develop strength, agility, speed, and coordination with a focus on functional movement patterns.
Kulshan Athletics also provides CrossFit classes that incorporate elements of weightlifting, Olympic lifting, gymnastics, and metabolic conditioning into a high-intensity workout. The highly qualified coaches provide guidance throughout each class and will ensure you’re getting the most out of your workout.
In addition to group classes, they also offer personal training services, so you can get one-on-one guidance from experienced trainers. Whether you’re looking to lose weight, gain muscle, or just get in shape, their team of dedicated professionals will work with you to help you reach your fitness goals. They are one of the best gyms in Bellingham, and for good reason.
At Kulshan Athletics Bellingham & Kulshan CrossFit, everyone is welcome regardless of age or fitness level. Join them for an intense and rewarding workout today!
- Location: 1726 Franklin St, Bellingham, WA 98225, United States
- Membership: Starting the basic membership at $100/month
- Gym Hours: 5 am- 6:30 pm
- Phone Number: +1 360-303-7577
- Website: https://kulshanathletics.com/
12. Bellingham Athletic Club

At Bellingham Athletic Club, we offer a wide variety of services for all our members. Our facilities are fully equipped with the latest in fitness technology, including treadmills, ellipticals, stationary bikes, and more. We also offer an expansive selection of group classes that cater to all levels of fitness from yoga to strength training. And if you're looking to get competitive, we have organized sports leagues and tournaments that allow you to do just that!
Whether you're looking to lose weight or just stay active, this fitness center is the place for you. Our knowledgeable staff is always ready to answer any questions and provide guidance on the best fitness plan for your needs. Come in and experience the amazing atmosphere and see what we can do for you!
- Location: 4191 Meridian St, Bellingham, WA 98226, United States
- Membership: Starting the basic membership at $15/month
- Gym Hours: 5:30 am-9:00pm
- Website: www.bellinghamathleticclub.com
13. CrossFit X

At CrossFit X, we believe that everyone should have access to a comprehensive fitness program that is tailored to their individual needs. Our experienced coaches and trainers will work with you to create a personalized workout plan and provide ongoing guidance, support, and motivation to help you reach your goals. We offer an array of fitness classes and programs such as CrossFit, HIIT, and Olympic Weightlifting, as well as nutritional counseling, massage therapy, and physical therapy services.
The goal of this fitness center is to not only provide our members with the tools necessary for success, but to also foster a positive and uplifting environment for personal growth and development.
- Location: 2031 Grant St, Bellingham, WA 98226, United States
- Membership: Starting at $172/month
- Gym Hours: 5:30 am – 6:30 pm
- Phone Number: +1 360-223-2051
- Website: https://www.crossfitx.com/
14. Evergreen Strength Gym

Evergreen Strength Gym offers both Private Training and Mountain Sport programs designed to help you reach your fitness goals. With Private Training, you get a program tailor-made to your individual needs with 1 on 1 appointment-based sessions. Mountain Sport is a functional strength and conditioning program designed for those who love the outdoors and want to stay in shape while still enjoying their favorite activities.
At Evergreen Strength Gym, we are committed to helping our clients reach their fitness goals and lead healthier lives. This fitness center offers both a private training program and a mountain sport program for those looking for a more intense workout. Our experienced trainers can create a personalized program tailored to your individual needs and help you reach your goals. No matter what you're looking for - improved strength, better cardiovascular endurance, or just an overall healthier lifestyle - Evergreen Strength Gym has something for everyone!
- Location: 1600 Kentucky St Suite B4, Bellingham, WA 98229, United States
- Membership: $99 for 3 months
- Gym Hours: 7 am- 6:30 pm
- Phone Number: +1 360-358-5099
- Website: https://www.evergreenstrength.com/
15. Iron Mountain Strength & Conditioning

At Iron Mountain Strength & Conditioning, we have a few core principles that guide our work with each of our clients. First, we believe in addressing each individual's physical, mental, and emotional needs to help them develop into the best versions of themselves. We take the time to truly understand our clients, and we use the most up-to-date training and nutritional strategies to design programs that are tailored to their specific goals. No wonder they're considered one of the best gyms in Bellingham.
Our second core principle is that no two clients are alike. We focus on helping individuals identify their current starting point and then create personalized plans for them to follow that will ensure they reach their goals as efficiently and effectively as possible. We believe in creating an environment of learning and support so that our clients can make meaningful changes in their lives and become the strongest, healthiest versions of themselves.
- Location: 1975 Midway Ln, Suite L, 1975 Midway Ln Suite K, Bellingham, WA 98226, United States
- Membership: Starting at $20
- Gym Hours: 5:30 am- 8 pm
- Phone Number: +1 360-510-3313
- Website: https://www.ironmountain360.com/
Conclusion
When it comes to finding a gym in Bellingham, WA, there are many great options to choose from. Whether you're looking for private training, HIIT classes, or functional strength and conditioning programs, you're sure to find something that fits your needs. We've highlighted fifteen of the best gyms in Bellingham- so that you can make the best decision for yourself and your fitness journey. So don't hesitate to give one of these top-rated gyms a try and start your path towards achieving your fitness goals!
]]>